




















How to Plan an Office Layout for Your Business?

How to Plan an Office Layout for Your Business?

Planning an office is more than placing desks inside available walls. It is a practical decision about movement, concentration, collaboration, comfort, and business growth. Effective office layout planning begins with observing how people actually work. Watch where meetings happen, where noise gathers, and where employees search for quiet. These details often reveal problems that a floor plan hides.

Architect Louis Kahn said, “A room is not a room without natural light.” His words remain valuable for modern workplaces. Daylight, air quality, acoustics, and clear circulation can influence how a space feels throughout the day. A good layout should place frequently used equipment near the people who need it. It should also leave enough room for safe movement, maintenance, and future changes. Accessibility must be considered from the beginning, not added later. Small choices matter. A printer beside a busy walkway may create constant disruption. A meeting table under harsh lighting may discourage long discussions.

The best plan connects workplace goals with real employee experience. It considers team structure, privacy needs, technology, visitor flow, and available budget. However, no layout is perfect. A design that works today may become restrictive after hiring changes. That weakness deserves attention. Measure the space, test different arrangements, and ask employees for practical feedback before committing. Even a simple trial with movable desks can expose hidden issues. This guide explains how to develop a flexible office layout that supports productivity without sacrificing comfort, identity, or human connection. Expect useful principles, but question every recommendation against your own workplace.
How to Plan an Office Layout for Your Business?

Define Business Needs, Work Styles, and Space Requirements

How to Plan an Office Layout for Your Business?

Define Business Needs, Work Styles, and Space Requirements

An effective office layout begins with business needs, not attractive furniture. List daily activities, team sizes, meeting frequency, storage demands, and privacy levels. A client-facing team may need welcoming meeting rooms. A finance team may require quieter workstations and controlled document access. Record peak occupancy, too. Empty desks can mislead planning.

Work styles should guide the floor plan. Observe how people actually work for one week. Note who needs focus, collaboration, movement, or confidential conversations. Provide a mix of assigned desks, shared tables, small rooms, and informal seating. Keep noisy areas away from concentration zones. Place frequently used equipment nearby, so staff do not cross the whole office repeatedly. Do not assume every employee wants an open workspace. That assumption often creates distraction.

Space requirements need measurable checks. Sketch circulation paths and keep entrances visibly clear. Allow enough room for chairs, cabinets, and safe movement. Review accessibility, lighting, ventilation, acoustics, and emergency routes with qualified professionals and local requirements. A pilot layout using temporary furniture can reveal awkward distances and unused corners. We once planned generous collaboration space, but staff preferred smaller rooms for focused discussions. The lesson was uncomfortable: our first survey asked what people liked, not what they did. Recheck the plan after several weeks and adjust based on observed use, not optimism.
Measure the Workplace and Identify Essential Functional Zones

A reliable office layout begins with accurate measurements, not attractive sketches. Record wall lengths, ceiling heights, columns, windows, doors, power points, and ventilation outlets. A laser measure improves precision, but verify unusual corners with a tape measure. Small errors can create large problems near corridors and workstations.

Observe how people use the workplace during busy and quiet periods. Note where conversations gather, where deliveries arrive, and which areas remain empty. Mark essential functional zones on a simple floor plan. These may include focused workstations, meeting spaces, reception, storage, printing, staff facilities, and informal collaboration areas. Keep noisy zones away from concentration areas. Place shared resources where employees can reach them without crossing private work areas. Clear routes matter.

Do not design only for the average day. Allow space for temporary projects, visitors, equipment changes, and future staffing. In my early layouts, I sometimes underestimated storage and overestimated meeting-room demand. That mistake made daily movement less efficient. Review the plan with employees before final decisions. Ask them to identify blocked paths, glare, noise, and inconvenient distances. A practical test can use temporary furniture or floor markings for several days. Measure again after feedback. The best plan may look less impressive on paper, but it usually works better during a crowded Monday morning.

How to Plan an Office Layout for Your Business?

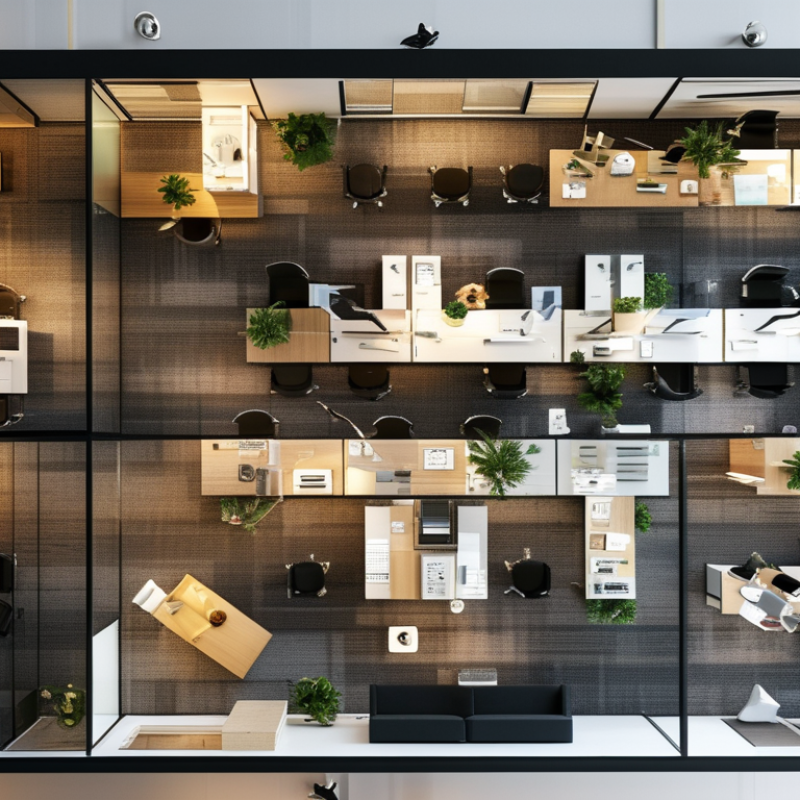
Measure the workplace first, then allocate space to essential functional zones. This example uses a 1,200 m² office and shows a practical area distribution for planning purposes.

The proposed layout balances individual work, collaboration, meetings, focused work, employee support, and circulation requirements.

Plan Workstations, Shared Areas, Circulation, and Privacy Levels

Plan the office around real work, not a fixed desk count. Start by mapping daily tasks: focused writing, private calls, team discussions, and informal problem-solving. Workstations should receive natural light without placing screens directly beside windows. Leave clear circulation paths between desks, shared areas, and exits. A practical target is 1.2 metres for main walkways, with wider zones near meeting rooms and kitchen areas.

Shared spaces need variety. Provide small rooms for confidential calls, medium rooms for project meetings, and open tables for quick collaboration. Privacy should increase with the sensitivity of the work. Use acoustic panels, screens, planting, and door seals before adding more walls. A 2018 study by Bernstein and Turban, published by the Royal Society, found that face-to-face interaction dropped by about 70% after open-plan conversions, while email activity increased. Open space is not automatically collaborative.

Test the layout with staff before construction. Ask them to track noise, interruptions, walking distance, and room availability for one week. Keep a few flexible areas, because teams change faster than furniture. The International Energy Agency’s 2023 buildings report states that buildings account for about 30% of global final energy use, so daylight access and efficient zoning also matter. Our first plan may be wrong. That is useful. Measure it, adjust it, and resist filling every empty corner.

How to Plan an Office Layout for Your Business? — Plan Workstations, Shared Areas, Circulation, and Privacy Levels

Space / Function Recommended Planning Metric Typical Capacity or Size Privacy Level Layout and Circulation Guidance Primary Planning Considerations
Open Workstations Approximately 6–10 m² (65–108 ft²) per workstation, including the immediate workstation zone One employee per desk; typical desk width is 1.2–1.6 m Low to medium Keep primary aisles clear; avoid positioning screens directly toward busy walkways; provide adequate separation between facing users Team interaction, daylight access, noise control, monitor privacy, storage, and electrical/data access
Private Offices Approximately 9–14 m² (97–151 ft²) per office, depending on furniture and meeting needs One person, or two people in a larger office High Locate away from high-traffic areas where confidential conversations take place; maintain a clear approach to the door Confidentiality, acoustic insulation, visitor seating, natural light, and managerial or specialist work requirements
Small Meeting Room Approximately 2.5–3.5 m² (27–38 ft²) per occupant, excluding oversized support spaces 2–4 people Medium to high Place near work areas for short discussions, but use acoustic treatment and a closable door to limit sound transfer Frequent booking demand, video conferencing, writable surfaces, ventilation, and speech privacy
Large Meeting Room Approximately 2–3 m² (22–32 ft²) per occupant, depending on table arrangement and equipment 6–12 people Medium to high Provide enough clearance around chairs and doors; position near reception or shared areas when external visitors are common Table configuration, presentation equipment, acoustics, accessibility, and flexible seating
Focus Room or Phone Booth Approximately 1.5–3 m² (16–32 ft²) per occupant One person Medium to high Distribute near open workstations without blocking main routes; ensure ventilation and safe occupancy conditions Short calls, concentrated work, acoustic performance, occupancy turnover, lighting, and air quality
Collaboration Area Approximately 3–5 m² (32–54 ft²) per user in the active collaboration zone 4–8 people Low to medium Place between team neighborhoods or beside shared project rooms; allow furniture to be rearranged without narrowing aisles Informal teamwork, mobile furniture, display surfaces, power access, and noise zoning
Reception and Waiting Area Approximately 2–4 m² (22–43 ft²) per expected visitor, plus reception furniture and circulation 2–8 visitors in a small or medium office Public to medium Locate close to the entrance; separate visitor movement from employee work zones and keep the exit route unobstructed Wayfinding, accessibility, security, visitor comfort, reception visibility, and brand-neutral professionalism
Break Room or Pantry Approximately 1.5–2.5 m² (16–27 ft²) per expected simultaneous user, excluding major storage areas About 10–20% of the office population at one time Low Keep away from quiet work zones where possible; provide clear access to appliances, sinks, waste stations, and seating Odor control, plumbing, cleaning, social interaction, appliance safety, and noise separation
Print, Copy, and Supply Area Approximately 3–6 m² (32–65 ft²), scaled to equipment and storage volume Shared by the nearby team or department Low Place near users who need it most, but not directly beside focus desks; maintain space for loading paper and opening cabinets Equipment noise, heat, storage capacity, maintenance access, paper workflow, and secure document handling
Main Circulation Aisle Plan a clear width of at least 1.2 m (47 in); increase width for high traffic, turning, or two-way movement Connect entrances, work neighborhoods, shared rooms, and exits Public to low Use a simple, legible route; do not allow furniture, storage, doors, or temporary equipment to reduce the required clear width Accessibility, emergency egress, traffic volume, door swings, visual orientation, and future reconfiguration
Secondary Work Aisle Commonly 0.9–1.1 m (35–43 in) clear, subject to local accessibility and building regulations Serves desks, storage, and low-volume destinations Low Use for lower-traffic movement only; avoid creating dead ends or routes that pass through confidential work areas Desk access, chair movement, storage doors, cleaning routes, and local building requirements
Storage and Filing Allocate space based on document volume, storage frequency, and cabinet dimensions; keep access zones clear Shared or departmental use Low to high, depending on contents Locate frequently used storage near users; place confidential records in controlled-access areas away from public circulation Load capacity, retrieval frequency, fire safety, document security, labeling, and future storage growth
Wellness or Quiet Room Approximately 5–9 m² (54–97 ft²), with enough clear floor area for the intended use One person or a small number of users High Place in a quiet, accessible location with visual and acoustic separation from kitchens, meeting rooms, and high-traffic routes Privacy, ventilation, lighting control, inclusive use, cleaning, and clear occupancy rules
Circulation and Support Allowance Reserve approximately 25–35% of the total usable office area for circulation, shared spaces, support functions, and internal access Varies with density, meeting-room ratio, storage needs, and workplace model Mixed Create clear transitions from public areas to collaborative zones, workstations, and confidential spaces; verify all dimensions against applicable codes Occupancy profile, hybrid-work patterns, growth, accessibility, fire safety, acoustics, and adaptability

Planning note: The dimensions above are practical planning ranges rather than legal requirements. Confirm final clearances, occupancy limits, accessibility provisions, fire egress, ventilation, and workplace safety requirements with the applicable local building and occupational regulations.

Select Furniture, Lighting, Technology, and Safety Features

Planning an office layout starts with furniture that supports real work, not just attractive photographs. I begin by measuring walkways, door swings, window positions, and power outlets. Desks should leave clear routes for movement and emergency access. Adjustable chairs can reduce strain during long computer sessions. Shared tables encourage collaboration, while quiet workstations protect concentration. I once placed a printer too far from the team, creating needless daily trips. That mistake changed my planning process. Storage should stay near the people who use it, but crowded corners need review.

Lighting affects comfort, accuracy, and energy use. Combine daylight with adjustable overhead fixtures and task lighting for detailed work. Position screens to reduce glare from windows and bright surfaces. A simple test helps: sit at each desk during morning and afternoon hours. Technology also needs physical planning. Provide cable channels, charging points, reliable network access, and room for future equipment. Leave service space behind screens and printers. Tight layouts become expensive to repair.

Safety features should feel natural rather than obstructive. Keep exits visible, floors dry, and walking paths free from loose cables. Use non-slip surfaces near entrances and provide adequate ventilation in enclosed rooms. Emergency lighting and fire equipment must follow local building requirements. Electrical work should be checked by a qualified professional. Accessibility deserves practical attention, including door clearance, desk height, and reachable controls. A layout may look efficient on paper, yet fail when someone uses mobility equipment. Walk through the space slowly before approval. Listen to staff feedback. Their complaints often reveal what drawings miss.

Review the Layout, Estimate Costs, and Prepare for Future Changes

Planning an office layout is not about filling every desk. It is about supporting real work. Review the layout with employees, not only on a digital floor plan. Measure noise, walking distances, meeting-room conflicts, and unused corners for two weeks. A 2024 global workplace survey found that employees need both focused and collaborative settings. A fixed desk arrangement may look efficient, but it can waste space when work patterns change. I have seen quiet desks placed beside printers, creating an avoidable daily distraction.

Estimate the full cost before approving the design. Include furniture, lighting, wiring, acoustic treatment, moving, permits, downtime, and maintenance. Set aside a 10–15% contingency for hidden conditions and price changes. The report Health, Wellbeing and Productivity in Offices links better ventilation, lighting, and acoustics with productivity gains of up to 11%. That figure is useful, but not universal. Local building conditions still matter. Use modular partitions, movable storage, and accessible power points. These choices make future changes cheaper.

Tips: Test one zone before renovating the whole office. Count actual seat use. Ask staff what failed. Keep a simple cost log, and review it weekly. Leave clear space around service routes. A perfect plan rarely survives the first month. That is normal.